Anthony Bernulf Hodge

Skyfield Studio

CERAMICS
Skyfield Studio Tour
Click on pictures
to enlarge image
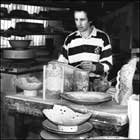
1. Throwing Pots - 1985
In the foreground, left - a group of oval vases, and background, right - a set of bowls. All of which have been thrown on a traditional 'Leach style' kick wheel. On the table, centre - alongside prepared clay is a group of square vases, handmade in pairs.

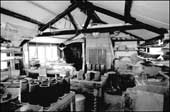
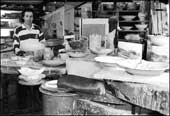
2. In the Studio - 1990.
With the traditional kick wheel in the foreground, the studio is full of pots in various stages in their construction. Choosing to work in small groups on a theme,where each piece is given individual attention.
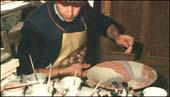
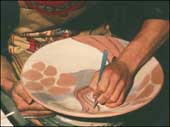
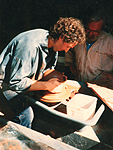
3. Painted Glaze Decoration - 1988.
4. Tidying up the design, before placing the bowl back into the kiln - 1988.
After the first kiln firing, which changes the dried out clay into a soft fired 'Biscuit' ware. A foundation or base glaze would be applied. Often by using spraying or dipping techniques. Then mixtures of different glaze colours, like any artist palette, would be hand painted on top and beside each other in layers and varying thicknesses. Notice however with all glazes, at this unfired stage, their colours are just pastel shades, and of course nothing like what they will melt into inside the furnace, during the second 'Glost' firing. Also being just a powder coating one must take great care handling each piece, until they are placed back inside the kiln.
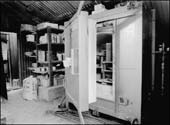
5. Inside the Kiln Room.
The Kiln, designed by 'Kilns and Furnaces' of Stoke on Trent UK, has four large burners on each side of the chamber, and is fired by mains gas. Above the Kiln itself is a 12 feet tall chimney to vent the gasses and 'draw' the mixture of gas and oxygen up through the chamber. Underneath and behind this big square insulated box are vents, which like the burners on each side, are used to control the various stages of the firing. This alongside working with the daily weather conditions, it made for a very exciting time, to achieve the right results. Not only in terms of the right top temperature to melt and fuse the glazes, but also to achieve the right atmosphere inside towards the end of the firing. To enhance the glaze colours a very careful process of cutting back on the oxygen entering the chamber called 'reduction' is carried out for a short period. Notice there is a plugged hole in the kilns swing door, through which it is possible to watch what is going on inside. Dark welding goggles are used to protect ones eyes at these very high temperatures of around 1280 degrees centigrade. To assist and confirm exactly what was happening at this critical stage of the firing small glazed samples were carefully pulled out of the furnace through the hole. Wearing leather gloves and holding a long stainless steel rod in hand, little glazed rings of clay could be fished out and plunged immediately into a bucket of water. Within seconds they could be handled and examined, and became a very reliable method to assure success of each firing.
6. Glost Firing 1990 - A look inside the Kiln before the door is finally closed and the gas burners turned on.
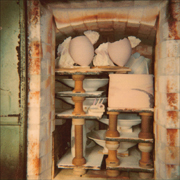
With every Glost firing, to achieve the best effects and maximise the space, a procedure of dry packing was adopted. The chosen pots to be fired would be set up and arranged inside the kiln before any glaze decoration was applied. This enabled me to achieve the right spacing around each pot to ensure a good flow of gasses throughout the chamber and an even reduction. At this stage small adjustments could be made without the chance of damaging what would have been powdery glazes. Each position would then be marked and the kiln unpacked in reverse order. The somewhat unorthodox packing style, as seen in this photo, was possible because the grey kiln shelves were extreemly strong being make of silicon carbide.
There were of course a number of different variations of packing arrangements according to the shape and sizes to be fired. Sometimes, as can be seen here, HTI kiln bricks were placed on top of the baffle wall as further protection for a pot from the flames coming out of the burner ports below, in this case it was the bowl immediately above and half way up on the left hand side in the photograph.
To ensure an absolutely flat surface and the possibility of height adjustment, small pieces of alumina shelving were used, especially under the bowls. This photograph also shows three temperature cones lined up with the spyhole together with three glazed test rings, which have been dipped in a celadon glaze. Celadon was chosen because the glaze characteristics under reduction are well understood. Please read the text above to see how the test rings were used.
7. Skyfield Studio - 1992 A
8. Skyfield Studio - 1992 B
9. Throwing demonstration - 1989
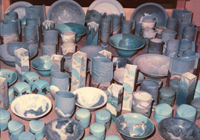
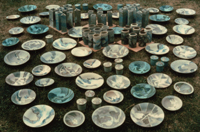
10. Two recently discovered old photos of some of the type of pots produced in 1981 and 1985. One never had time to take photographs of them all, it was only ocassionally when sorting pieces out for the galleries, and just to remind me what had been made.